Checks
Last updated: November 6, 2024
Configuring Checks
Checks help you identify issues or anomalies in your data. For example, you might want all Operating Expenses in your ERP to have a vendor name or confirm numbers across data sources match.
Getting started is easy using our no-code builder. You can also use SQL if that is where you’re most comfortable. Either way, configuring a Check only takes a few minutes.
To set up a Check, follow these steps:
Open the Aleph web app
Navigate to the Checks section on the left-hand side
Click "Add Check" in the top right corner
Name your Check and give it an optional description
Select the table you would like the Check to apply to
Define the rows, columns, and filter criteria using either the Pivot or SQL interface
Click "Create and run"
Whenever new data is introduced, Aleph will automatically check it and post an alert when matches are flagged.
Checks are designed to "Pass" if they don't return any rows and "Fail" if there are matches. In other words, you should design the Check to only return rows that need to be addressed.
For example, if you require all expenses to have a vendor, you can create a Check to identify all expenses without a vendor. This helps identify any issues or data discrepancies that need attention.
Failed Check alerts are displayed in the web app, but you can also install and configure Aleph's Slack app to send alerts directly to Slack.
Configuring Check Slack Alerts
First, you'll need to connect the Aleph📄 Slack App
Once enabled, you’ll see a Slack logo at the top of any Checks page. Click the icon, and a setup modal will appear, allowing you to configure the desired channel and frequency for alerts.
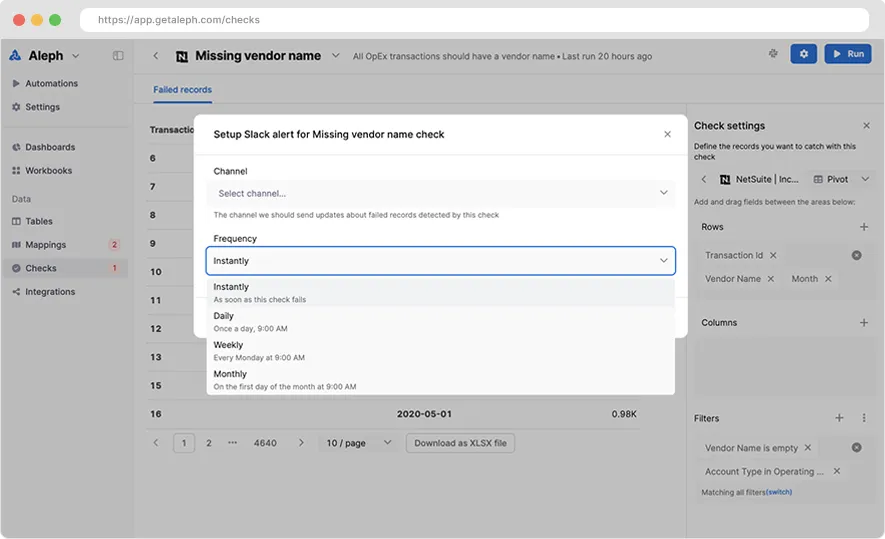
Save your settings and you’re all set. When a Check runs and flags results matching your filters, Aleph will push the matching results to Slack at the frequencies defined in the settings.
