Rippling Setup Guide
Last updated: November 6, 2024
Pre-requisites
To establish the connection, you will need a Rippling admin user.
Setup steps
This setup guide will walk you through the step by step to:
Create a report in Rippling
Setup the integration in Aleph
Automate the delivery of the report on a daily basis from Rippling to Aleph
This integration contains 2 different tables: Heacount and Payroll. You will have to set up 2 integrations in Rippling and in Aleph.
Rippling Headcount
Create a new report in Rippling
Navigate to the reports section within Rippling and select Start from scratch
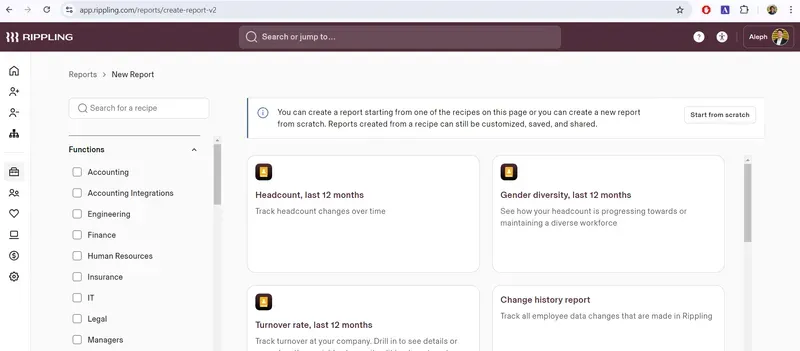
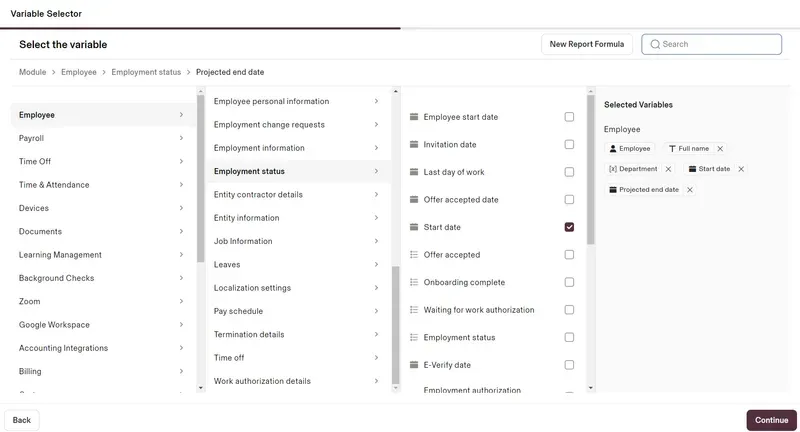
For Rippling Headcount, create a report with at least the following columns:
Employee > Employee Personal Information > Full Name
Employee > Employment information > Department
Employee > Employment status > Start date
Employee > Employment status > Projected end date
Employee > Compensation > Total Annual Compensation
Without these columns the integration won't work. If you would like to exclude any of those columns from the report, please contact customer support
Feel free to add any additional columns: these will be added to the final report. Once you are done click on Continue
Download the report in format csv. This file will be necessary during the integration's setup

Save the report and add a name to the report
Setup integration in Aleph
Create a new Rippling | Headcount integration in Aleph
Getting Started
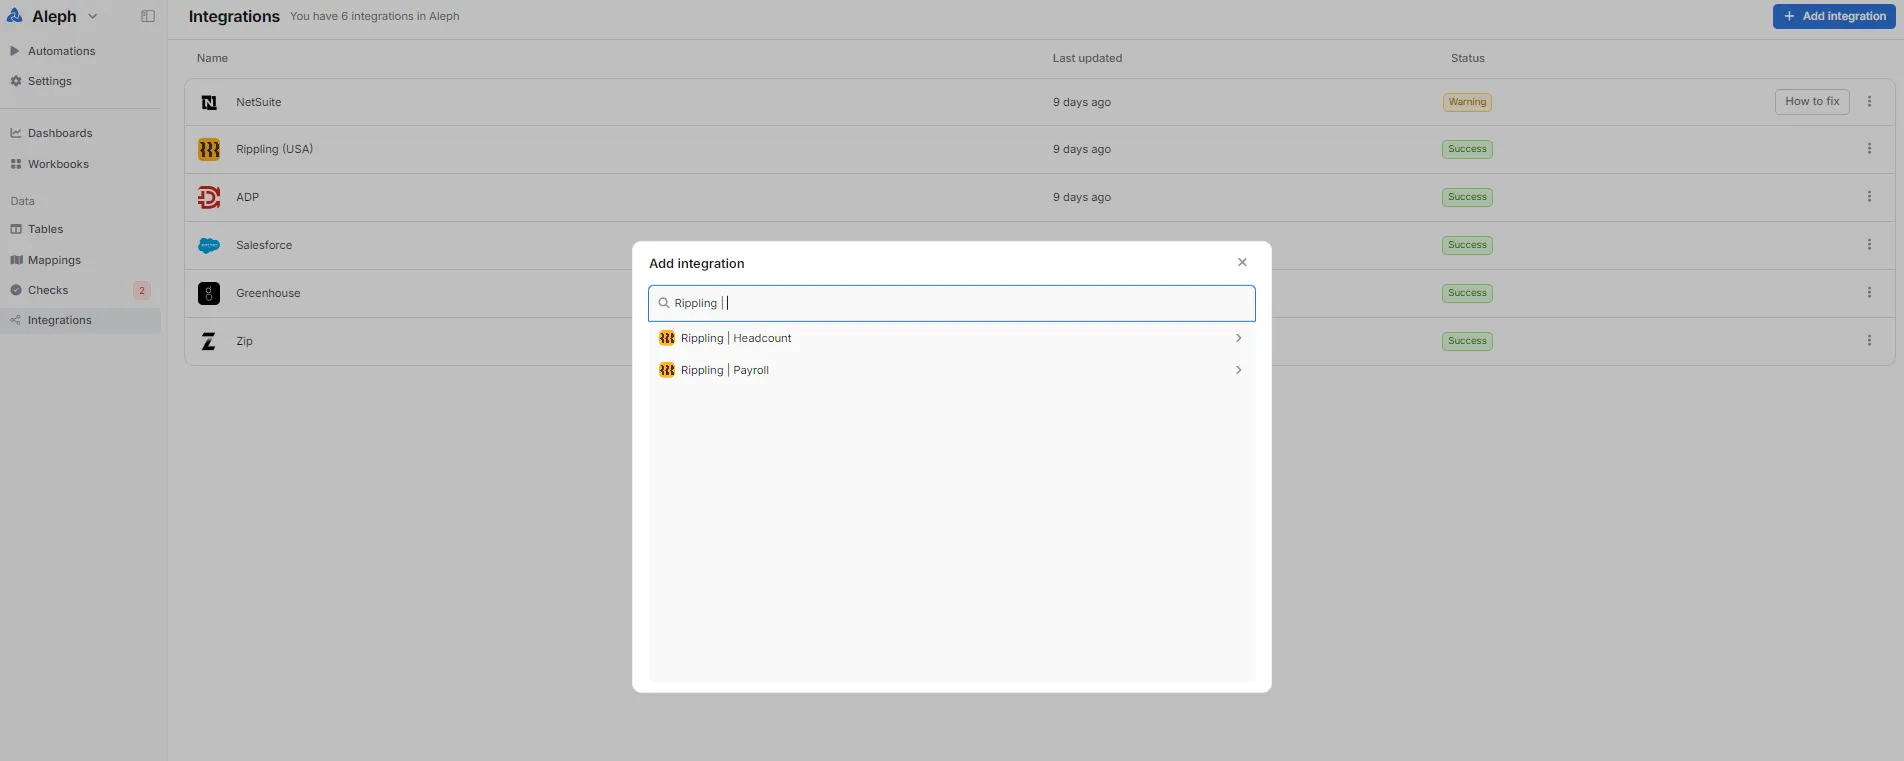
First go to the Aleph web app on the left hand side panel you will find
Integrations, click on itGo to the top right corner and click
+ Add IntegrationType
Rippling | Headcounton the search box and select the option from the results list
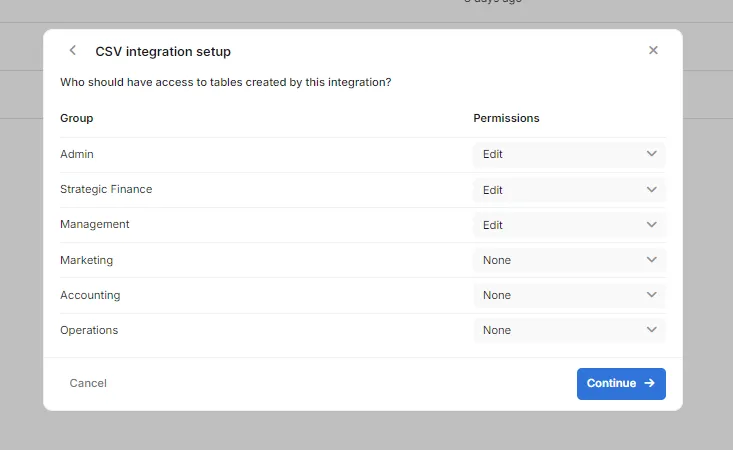
Setting up the right permissions for your Aleph users
In this step, you can grant the desired permissions to your user groups by selecting between the following options in the drop-downs: Edit, View, and None. To learn more about groups and permissions, please visit the📄 Users, Permissions, and Groupssection.
Integration name
Next, select a name for your CSV integration and click Set up.
Your integration name will also be your table name. We suggest following this structure Name of system | Type of table.
e.g. Rippling | Headcount
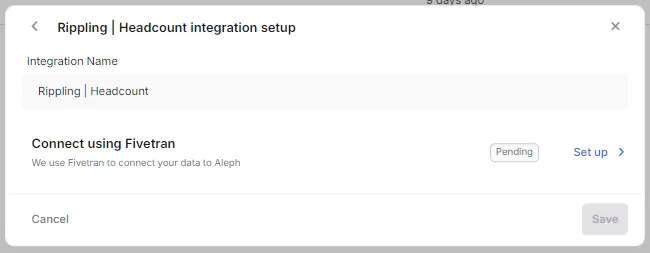
Generate an email address and set up the basic configuration
Make sure to copy the auto-generated email address at the top of this page to a safe place for future reference as you will need it for our schedule reporting in Rippling.
Please go through these configurations:
Change the file type to CSV
Click on the toggels to deactivate
Skip header linesandskip bottom lines

Send CSV file to the generated email address and finish the setup
Open your email account and send your CSV file to the email address copied from the previous step. After sending the email, wait 1-2 minutes to allow the software to process the file.
Once completed, go back to the previous screen and click Save & test and wait for the tests to run.
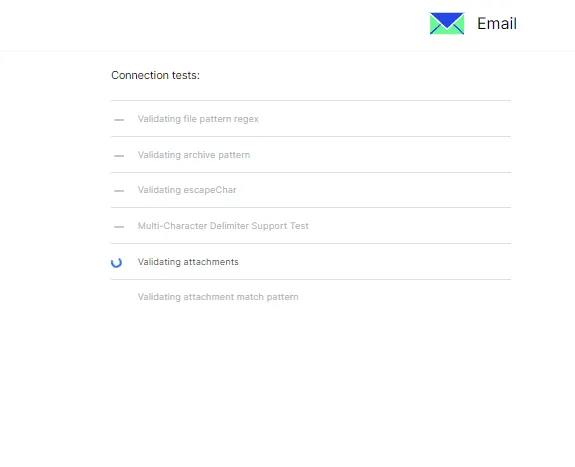
Once the tests are complete, you will be automatically redirected to Aleph's integration page and from here click Save on your integration.
Aleph will start processing the CSV files sent via email and create/update the table. Once Aleph is done processing the file (about 10-15 minutes), the status will change from Refresh Pending to Success.
Now you have to go back to Rippling to set up an automated process to send the report daily.
Set up a scheduled report in Rippling
Go to Tools on the left side menu and click Workflow studio

Click on Create workflow and you will be moved to a new screen
On the searchbar, type schedule report and then select the option of schedule report

Give a name to the workflow and set a frequency for emailing this report. Suggested inputs:
Name:
Headcount AlephFrequency:
Daily at 6AM
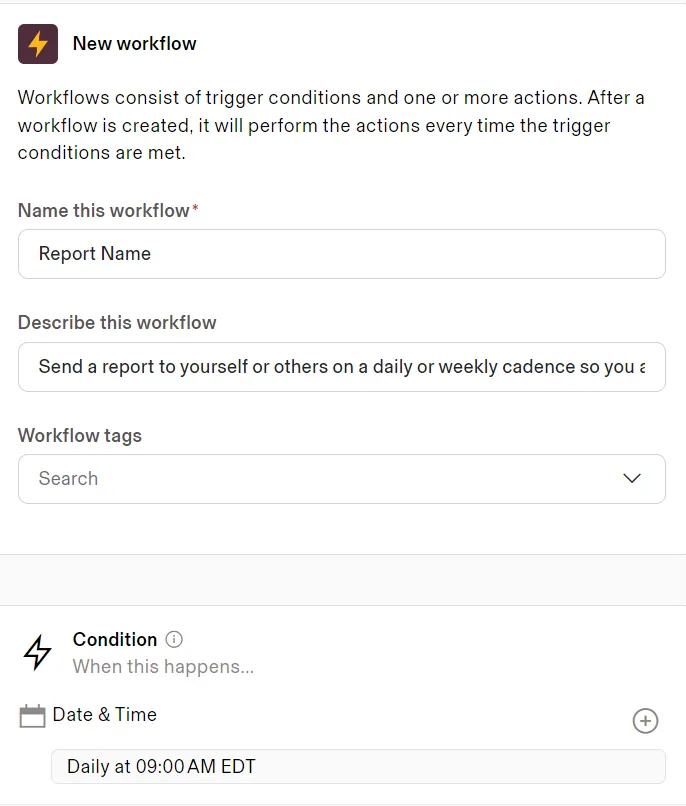
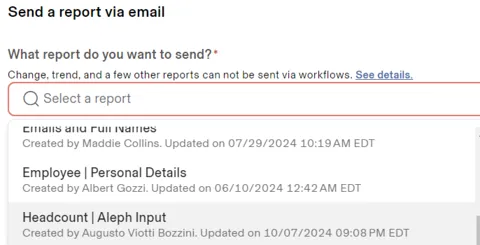
Go to the box named Send a report and click on Please select the report
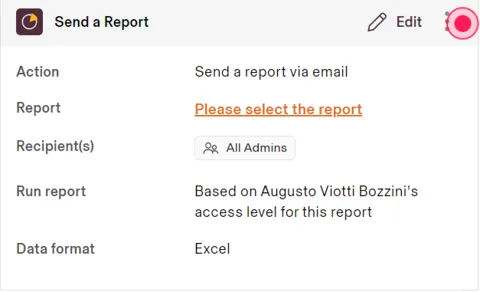
Use the searchbar to find your report and select it
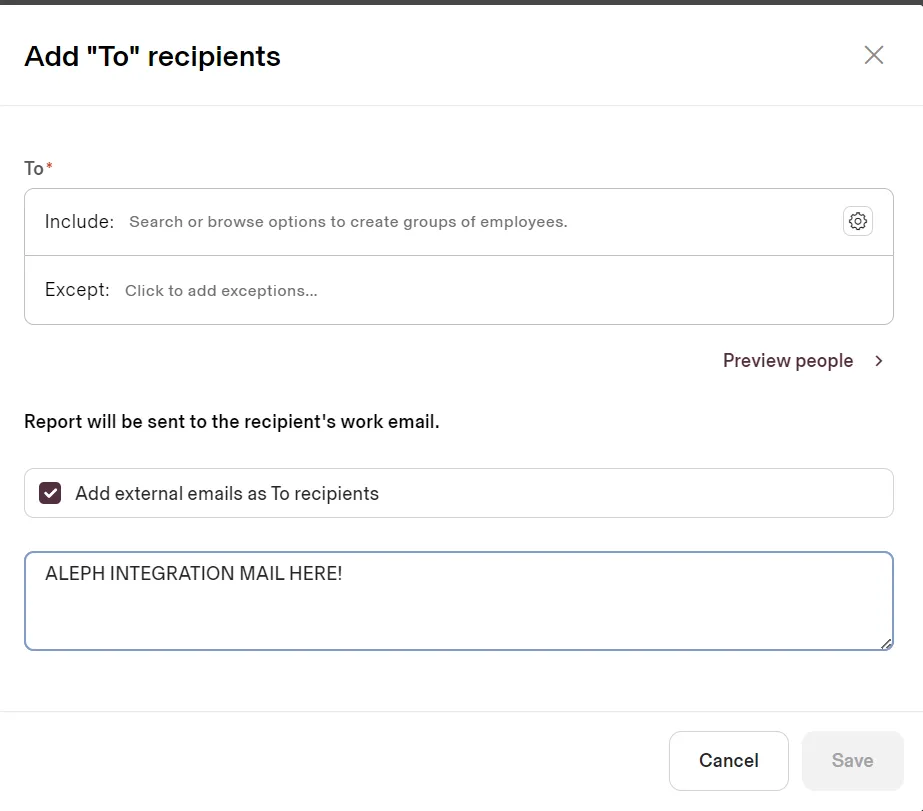
Click on recipients and check Add external emails as To recipients. Paste the email generated on the step before and save
Click on Done and it will take you to the workflow builder screen. Once you finish, click on create workflow and you will be done with the setup process!
Rippling Payroll
Create a new report in Rippling
Navigate to the reports section within Rippling and select Start from scratch
For Rippling Payroll, create a report with at least the following columns:
Employee > Employee Personal Information > Full Name
Employee > Employment information > Department
Time & Attendance > Shift Payroll details > Pay period start
Time & Attendance > Shift Payroll details > Pay period end
Without these columns the integration won't work. If you would like to exclude any of those columns from the report, please contact customer support
Feel free to add any additional columns: these will be added to the final report. Once you are done click on Continue
Download the report in format csv. This file will be necessary during the integration's setup
Save the report and add a name to the report
Setup integration in Aleph
Create a new Rippling | Payroll integration in Aleph
Getting Started
First go to the Aleph web app on the left hand side panel you will find
Integrations, click on itGo to the top right corner and click
+ Add IntegrationType
Rippling | Payrollon the search box and select the option from the results list
Setting up the right permissions for your Aleph users
In this step, you can grant the desired permissions to your user groups by selecting between the following options in the drop-downs: Edit, View, and None. To learn more about groups and permissions, please visit the📄 Users, Permissions, and Groups section.
Integration name
Next, select a name for your CSV integration and click Set up.
Your integration name will also be your table name. We suggest following this structure Name of system | Type of table.
e.g. Rippling | Payroll
Generate an email address and set up the basic configuration
Make sure to copy the auto-generated email address at the top of this page to a safe place for future reference as you will need it for our schedule reporting in Rippling.
Please go through these configurations:
Change the file type to CSV
Click on the toggels to deactivate
Skip header linesandskip bottom lines
Send CSV file to the generated email address and finish the setup
Open your email account and send your CSV file to the email address copied from the previous step. After sending the email, wait 1-2 minutes to allow the software to process the file.
Once completed, go back to the previous screen and click Save & test and wait for the tests to run.
Once the tests are complete, you will be automatically redirected to Aleph's integration page and from here click Save on your integration.
Aleph will start processing the CSV files sent via email and create/update the table. Once Aleph is done processing the file (about 10-15 minutes), the status will change from Refresh Pending to Success.
Now you have to go back to Rippling to set up an automated process to send the report daily.
Set up a scheduled report in Rippling
Go to Tools on the left side menu and click Workflow studio
Click on Create workflow and you will be moved to a new screen
On the searchbar, type schedule report and then select the option of schedule report
Give a name to the workflow and set a frequency for emailing this report. Suggested inputs:
Name:
Payroll AlephFrequency:
Daily at 6AM
Go to the box named Send a report and click on Please select the report
Use the searchbar to find your report and select it
Click on recipients and check Add external emails as To recipients. Paste the email generated on the step before and save
Click on Done and it will take you to the workflow builder screen. Once you finish, click on create workflow and you will be done with the setup process!