Aleph Function
Last updated: November 5, 2024
The Aleph Function allows you to bring in data that lives in the Aleph web app directly into Excel with a formula that is similar to a SUMIFS formula. The Aleph function makes it easy to update spreadsheets with new data without having to pull in a new sheet. You can update and create new reports with only a few clicks.
Syntax
Excel
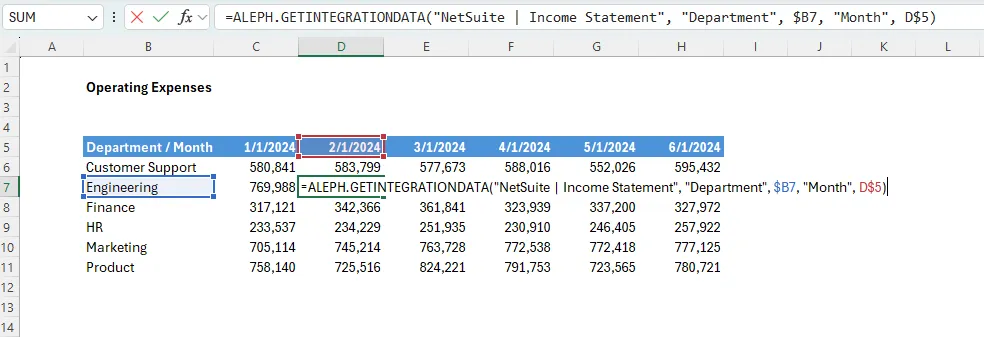
The syntax of the Aleph function is as follows:
=ALEPH.GETINTEGRATIONDATA(table_name, [dimension_1],[criteria_dimension_1], [dimension_2], [criteria_dimension_2],..., [dimension_n], [criteria_dimension_n])
Where:
Argument name | Description |
table_name | The name of the table in Aleph in quotation marks |
dimension_1 | The exact name of a dimension (column) in Aleph in quotation marks |
criteria_dimension_1 | The criteria that defines which rows from dimension_1 will be added in quotation marks |
Tip: Dimension_1 and criteria_dimension_1 set up a search pair whereby the table indicated by table_name is searched for specific criteria that matches the designated search pairs.
Google Sheets
The Aleph function shares exactly the same logic in Google Sheets as it does in Excel, however, the function name varies slightly.
You will have to replace the . for an _.
The syntax for Google Sheets is as follows:
=ALEPH_GETINTEGRATIONDATA(table_name, [dimension_1], [criteria_dimension_1], [dimension_2], [criteria_dimension_2],..., [dimension_n], [criteria_dimension_n])
Tip: Like any Excel and Google sheets formula, the Aleph function allows you to reference another cell rather than having to write out the values for each argument.
E.g.: =ALEPH.GETINTEGRATIONDATA($B$6,$C$5,$B12,$D$5,E$9)
Aleph functions are case sensitive, so make sure that the table name and dimensions match what is in Aleph
Formula Builder
The “Functions” section in the add-in can help you set up Aleph functions. To use the add-in to create Aleph funtctions follow these steps:
In the add-in, click "Add"
Click "Aleph function"
Select the table you would like pull data from
Fill out the dimensions and criteria in the "Formula" section
For multi-measure tables, select the measure that you would like to use
For more information about multi-measure tables, please refer to Tables
Select the cell where you want to apply the formula
Click on "Apply To Cell"
Edit or copy and paste the formula to other cells
Wild Cards
Same as with SUMIFS formulas in spreadsheets, you can use wild cards to apply logic to your Aleph functions.
Greater Than and Less Than
If you want to apply a greater than / less than criteria, you can apply the following operators in your formula: > , >=, <, and <=.
Syntax:
...,[dimension_1],">="&[criteria_dimension_1],...
Example:
If you want to pull different periods of time, you can apply the following formula:
=ALEPH.GETINTEGRATIONDATA("Netsuite | Income Statement,"year","2024","month","<="&"03/31/2024","account","4000 - Subscription Income","location","US")
This will bring you the value YTD until Mar-2024.
Select All
If you want to apply a select all criteria, you can apply the following operator in your formula:*.
Syntax:
...,[dimension_1],"*",...
Example:
If you want to pull data for all locations, you can apply the following formula:
=ALEPH.GETINTEGRATIONDATA("Netsuite | Income Statement,"month","<="&"03/31/2024","account","4000 - Subscription Income","location","*")
Starts With
If you want to apply a select all for a dimension that begins with a specific criteria, you can apply the * operator following the characters that the desired criteria begin with.
Syntax:
...,[dimension_1],"[criteria_dimension_1]*",...
Example:
If you want to pull data for all the 4000 level accounts, you can apply the following formula:
=ALEPH.GETINTEGRATIONDATA("Netsuite | Income Statement,"month","03/31/2024","account","4*")
Exclude
If you want to exclude rows from a dimention that match a specific criteria, you can apply the following operator in your formula: <>.
Syntax:
...,[dimension_1],"<>"&[criteria_dimension_1],...
Example:
If you want to pull data for all locations, except those in the US:
=ALEPH.GETINTEGRATIONDATA("Netsuite | Income Statement,"year","2024","month","<="&"03/31/2024","account","4000 - Subscription Income","location","<>"&"US")
Sharing Your Spreadsheet
If you want to share your spreadsheet containing Aleph formulas with other parties that don't have user access to Aleph or the add-in, you can do either of the following:
Replace the formulas with values
Lock / Unlock the functions
Accesing the Aleph Function Settings
Go to "Add" and select "Aleph Function"
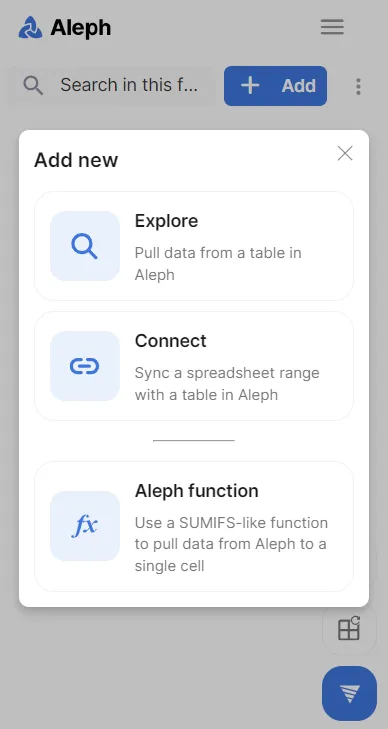
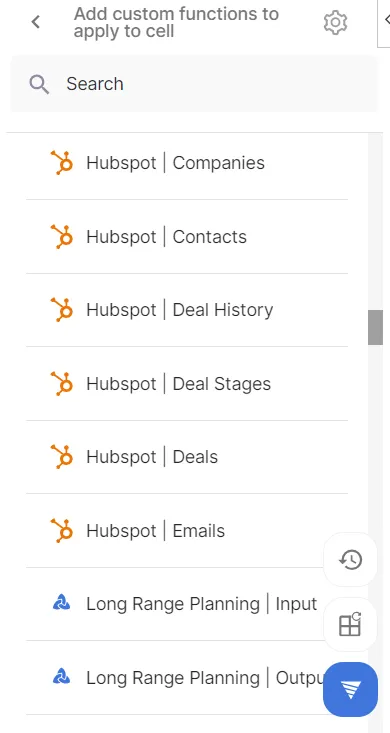
Click on the settings icon at the top right
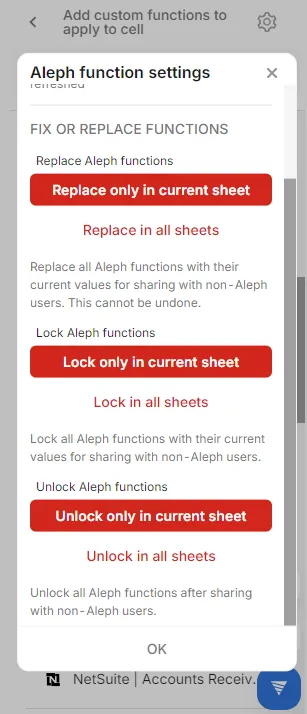
This will open the Aleph function settings
Replacing Formulas with Values
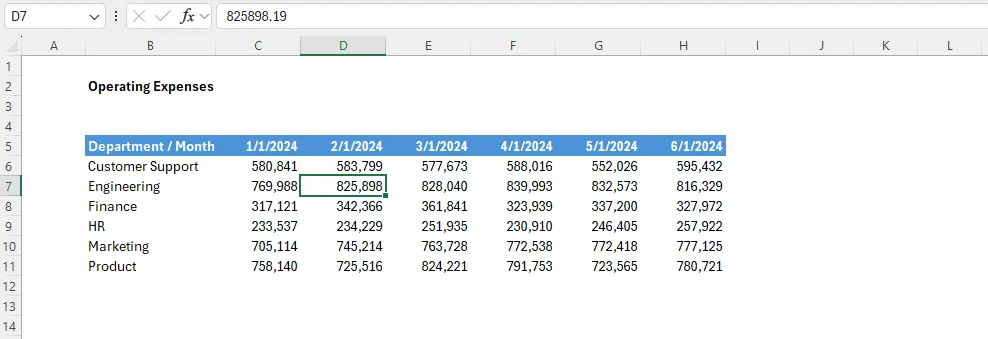
If you click on "Replace only in current sheet" or "Replace in all sheets", all of your Aleph functions will be replaced with values.
This action cannot be undone, as the formulas will be removed and the values will be hardcoded into the cells. If you want to use this function, it is recommended to generate a copy of your spreadsheet first and replace the values in the copied version.
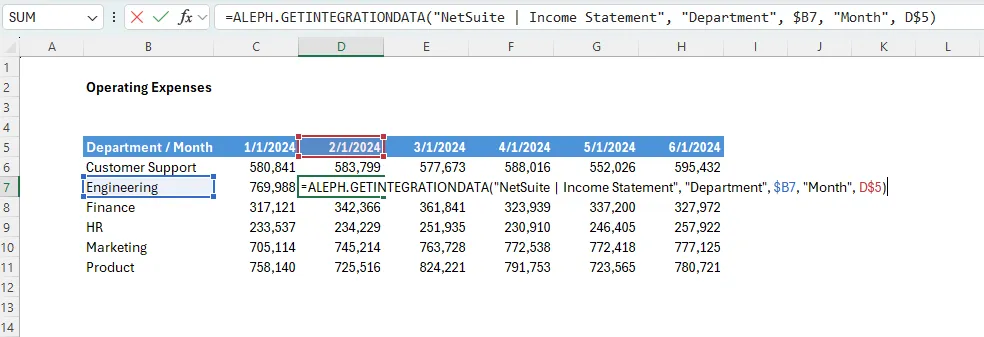
Example:
This is how your report looks like before replacing functions with values:
This is how it looks like after replacing functions with values:
Locking / Unlocking Aleph Functions
If you click on "Lock only in current sheet" or "Lock in all sheets", an IF formula will be added on top of the Aleph function.
Locking a function freezes the value of the cell allowing you to:
Share your reports without needing to copy the spreadsheet with hardcoded values.
Prevent unintentional refreshes of all functions in the sheet/workbook.
Example:
Locking your function will always return a formula-driven value, regardless of if the viewer is an Aleph user or not.
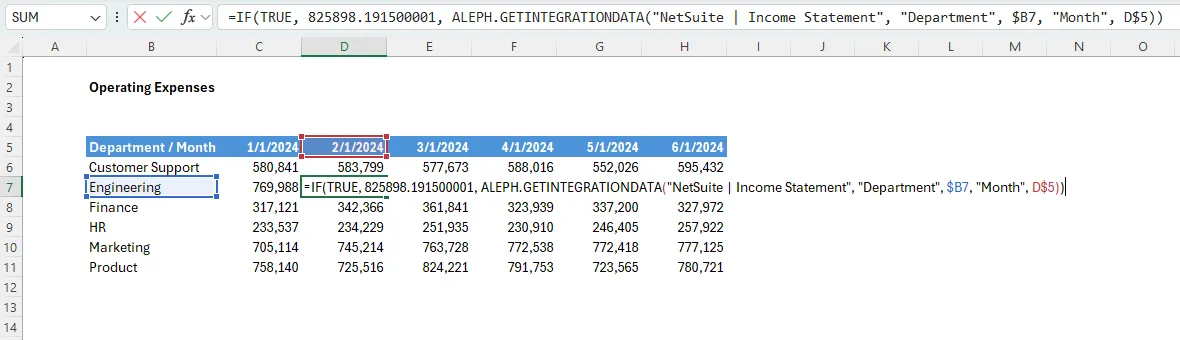
Clicking "Unlock only in current sheet" or "Unlock in all sheets" returns your function to the standard format, allowing you to refresh and edit the Aleph function.
Example:
Once unlocked, the IF formula is removed and the function returns to normal.
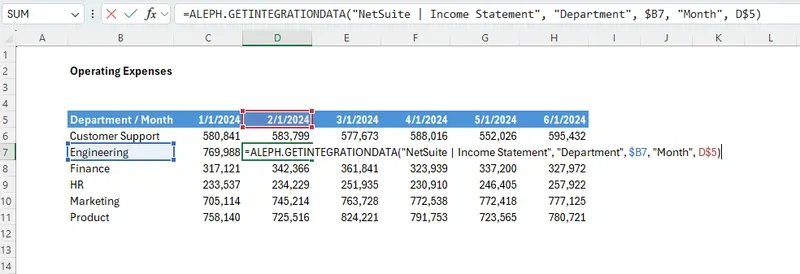
Refreshing your Aleph Functions
Once you have built reports with the Aleph functions, you can refresh them to get the most updated data from your integrations. Follow these steps:
Select the range you want to update
Click "Refresh Selection"
Aleph will refresh and bring in your data to include the newest data that is available.